Haul: Room/Home Decor

 Friday, August 10, 2012

I moved into my new apartment last month, and I have been having a blast decorating the space! I didn't put much effort into decorating my last apartment because I knew I would only be living there for a year. I think I'll probably live in my current apartment for 3-4 years while I attend optometry school. I have been scouting vintage home decor places, thrift stores, garage sales, Marshalls, Ross, and the like for unique home decor items. I was able to find some cute pieces this week that I would like to share:

Letter holder from Marshalls


Subway art from Marshalls

"Home" Photography from Artscape in Baltimore, MD

Tealight Holder from a vintage decor shop

Corner shelf from a vintage decor shop


Read more...

DIY: Two Tiered Jewelry Tray

 Sunday, August 5, 2012


This was an incredibly easy and inexpensive project. I bought two plates from the clearance section at TJ Maxx for $5 total and a candle holder at AC Moore for $3.


I'm aware that you can purchase candle holders at dollar stores, but my local dollar store did not carry them. I spray painted my candle holder white, and used my hot glue gun to attach the two plates onto the candle holder. The total time to complete this project was under 10 minutes!


Read more...

DIY: Dry Erase Calendar w/ Paint Chips

 Tuesday, July 17, 2012


This is a very easy and affordable project. I didn't have any large frames on hand, so I went to AC Moore and snagged a 11"x16" one on sale for $10 (originally $22). Then, I went next door to Home Depot and raided their paint chip selection. I grabbed way more than I needed, but hey, they're free.

These are all the supplies you need:
-Large frame (Mine was 11"x16" and it was the perfect size for 2"x2" squares. You could get one that is slightly larger if you want your paint chips to be more spaced out.)
-Paint chips
-Glue or double sided tape
-Scissors
-Dry erase marker

I don't think a tutorial is necessary for this project; it's pretty self explanatory! :)

P.S. I didn't think I would appear in the reflection as evidenced by the attractive towel on the top of my head.. at least I'm dressed. ;-)

Read more...

Antique Vanity Makeover & First Furniture Painting Experience

 Saturday, July 14, 2012


I found this beauty on Craigslist for $90. It's circa 1920s and made of solid mahogany wood. I decided to bring new life to this already stunning vanity. All my furniture is white anyway, so I wanted to keep with the theme. I have never painted furniture before, so I was very apprehensive. However, with caution and technique, I successfully transformed this vanity into a beautiful asset in my bedroom.

These were all the supplies I used
:
-100m sandpaper (Lowes)
-Zinsser primer (Lowes)
-Olympia paint in White (Lowes)
-Floetrol (Lowes)
-Paint trays (Dollar store)
-Mini foam rollers (Dollar store)
-Foam brushes (Target)
-Small paintbrush (Michaels)
-Cloth


This is what the vanity looked like after I primed. I'm typically a perfectionist, so I surprised myself by not taking extra steps to make this piece look more presentable. I figured that since I would be applying several coats of paint afterwards, it wouldn't matter how my prime job looked like. In fact, I took this time to test out whether I liked using a paintbrush or foam rollers better. On the left side of the vanity, I used a paintbrush and on the right side, I used a foam roller. Although it's hard to tell in the picture, the right side looks much neater, and took half the time as opposed to using the brush on the left side. After that, I put my brush away and did not use it for the remainder of the project. I was using Purdy paintbrush, fyi. Don't forget to sand your piece before you prime. Sanding is not necessary for all finishes (i.e. laminate), but I felt that I should sand this piece since the surface was not completely smooth. I used a cloth to remove the debris. A hand held vacuum works well too.


This is what the vanity looked like after 1 coat of paint. Much better, but still a lot of wood showing through. I would need at least 3, maybe 4 more thin coats. Make sure you apply your paint in THIN coats. Several thin coats will look much better than 1 thick coat. I mixed a small amount of Floetrol, a paint conditioner, with my paint to minimize any roller marks.


After 2 coats. I painted the second coat the following morning. Make sure you wait at least 6-8 hours before applying another coat. Even if the paint may be dry to the touch, you still want to wait. I learned this from blogs written by professional painters.


Third coat! I am loving how this piece looks by the end of this coat. I debated on whether or not I should paint a 4th coat, but I decided against it. I liked the somewhat distressed/shabby chic appeal with parts of the wood seeping through. It looked natural, and not like a bad paint job. I took the time to touch up on some areas with a small paintbrush, such as the fluted legs and the crevices of the detailing above the drawers.

All in all, this was a pretty tiresome process. I enjoy painting, but this vanity had so many grooves and such that it was more tedious than I had anticipated. Will I do another paint job? Yes, if it's mostly flat surfaces (i.e. dresser or table). No, if it's a complicated piece. ;)

Read more...

DIY: Sunburst Mirror

 Sunday, July 1, 2012

I give 100% credit for this tutorial to Heather on Setting for Four. I saw her take of the ever so popular sunburst mirror on Pinterest, and decided to follow her tutorial to make one for myself. This is how mine turned out:


Perhaps not as nice as Heather's, but I still love the outcome. These are the materials I used:


-Scrapbook paper: I used a plain baby pink scrapbook paper and one with a floral print
-Plain white computer paper
-Hot glue gun
-Scissors
-10 inch ceiling medallion
-12 inch wooden ring
-5 inch mirror
-2 silver beaded bracelets
-2 bracelets with silver charms and coral beads

Also pictured is a string of coral colored shells that I was planning to use, but decided against it.

Heather does a thorough job of explaining the steps on her entry, but I will also summarize them here.

1) Use the plain white computer paper to cut out your desired ray shape that will give your mirror the sunburst effect. I created two different sized rays.

2) Use these cut-outs as a template to trace onto your scrapbook paper. I cut out 13 large rays and 26 small rays. Fold the rays in half to add dimension.

3)Glue these around your wooden ring. As you can see, I added two small rays in between each large ray. Tip: Attach the rays as close to the center of the ring as possible so that very little to no wood shows. I didn't do that on one part of the wooden ring and it was evident when I attached the medallion to it!

4) Glue the mirror onto the medallion.

5) Take your beaded silver bracelets and cut the waistband. Be careful when you do this or the beads will explode, fly, and scatter everywhere--speaking from personal experience. Place the stringed beads around the mirror and glue it onto the medallion.

6) Repeat the step above with the other bracelets that has the charms. Obviously, you can use any other decorative bracelet or material. Heather used shell beads on hers. The one I chose added some more texture and color to my mirror, which I liked.

7) Glue the medallion onto the wooden ring and voila! You've got yourself a lovely sunburst mirror.


Mine is currently hanging above my entrance table by the front door, and I love it. If you follow this tutorial or made your own version of the sunburst mirror, I would love to see it.

Read more...

Beauty Haul: iHerb & Amazon

 Saturday, February 4, 2012


Hi everyone! I want to share a collective beauty haul from iHerb and Amazon. I will not review any products in this post because I've only used them once or twice thus far.

I stumbled upon this post on Apartment Therapy, and became very interested in coconut oil. I have troubled skin (blemishes, hyper-pigmentation, sensitivity, dry spots, etc), and everyone was raving about how coconut oil worked miracles for their skin and hair. I don't live near a Trader Joe's, so I went to the next best organic supply shop--in the comfort of my own living room: iHerb! If you're not familiar with iHerb, they sell brand name natural products from vitamins to beauty products. Not surprisingly, coconut oil on this site had rave reviews as well. I was sold. I bought a jar of it as well as this Alba body lotion. I have dry skin from head to toe during the winter, and those damn Bath & Body Works/Victoria Secret lotions that I must have received 6 of during Christmas, do not hydrate my skin.

If you are interested in making a purchase on iHerb, you can use this code to get $5 off your first order: NEZ002

From Amazon, I purchased these My Beauty Diary masks since they were on sale. I bought the Aloe and Mixed Berry masks. The aloe mask is targeted for dry and sensitive skin, and the berry mask claims to brighten skin. I will probably post a review on these masks in the near future. I also bought Korres Quercetin & Oak Antiageing & Antiwrinkle Night Cream. I saw it on Sephora, but was able to snag it on Amazon for just $35 ($17 cheaper than Sephora!). Last but not least, I purchased the Ole Henricksen Truth Serum Collagen Booster. This is my very first serum, but the benefits seemed well worth it. I bought a 0.5 oz bottle for just $18 (a 1 oz bottle at Sephora is $48).

Hopefully, I will see good results with these products.

Read more...

2011 Beauty Favorites

 Sunday, January 8, 2012

Hi everyone! Here is an overdue post on my favorite beauty products for 2011. I'm astounded that 2011 is already over, but I'm excited to start anew! I have so many goals set for 2012, one being to be less neglectful of this blog. I'm going to try to post on a consistent basis, although I predict that I may go on a hiatus once optometry school begins in August.

Skincare/Body:
-Basis Cleaner Face Wash: leaves my face feeling squeaky clean and is great for sensitive skin (soap free, oil free, etc.)
-Body Shop Vitamin E Eye Cream: diminished my dark under eye circles in just a week of consistent use.
-Sonia Kashuk Eye Makeup Remover: always removes every trace of eye makeup.
-Tree Hut Brazilian Nut Body Wash: smells amazing!
-Yes to Cucumbers Facial Towlettes: removes my face makeup without irritation and leaves my skin feeling clean and refreshed.

Makeup:
-Urban Decay Naked Palette: my go to palette for any neutral or smokey eye look.
-Milani Liquid Eyeliner: is budge-proof throughout the day and has a sharp tip for drawing precise lines.
-Revlon Lip Butters: comes in a variety of colors, cute packaging, and really moisturizing. My favorite color is Fig Jam (pictured). It looks really dark in the tube, but is much lighter on the lips.
-Loreal Magic Souffle Foundation: provides good coverage, does not look cakey, and stays put throughout the day.
-Neutrogena Healthy Skin Foundation: provides good coverage, does not look cakey, and stays put throughout the day.
-Amazing Concealer by Amazing Cosmetics: conceals blemishes very well
-Stila Kajal Eyeliner in Pearl: my favorite eyeliner to use in the inner corners of my eyes. So creamy, bright, and stays put all day.

Read more...

Indian Style Chicken Curry

 Sunday, September 11, 2011

I fell in love with Indian cuisine during my first semester of college when I visited a restaurant called Sitar India in Philadelphia, PA. Ever since then, I crave Indian food at least once a week. I have cooked several Indian curry recipes, but I finally found my go-to Indian curry recipe. I followed this recipe almost to a T, but made a couple modifications to better suit my palate. Here are the ingredients I used:

Pictured: (L to R) cayenne pepper, garam masala, coriander, crushed tomatoes, curry powder, turmeric, plain yogurt, boneless chicken breast, cilantro, onions
Not pictured: minced garlic, potato, ground ginger, cumin

Directions:
1) Cut 2 lbs of chicken into bite sized chunks. Season with 2 tsp of salt. Cook chicken until lightly browned.
2) Put chicken aside. In the same skillet, cook 1.5 cups of diced onions, 1 tbsp of minced garlic, and 1 tsp of ground ginger until the onions are translucent.
3)Stir in 1.5 tsp of curry powder, 1 tsp of coriander, 1 tsp of turmeric, 1.5 tsp of cayenne pepper, 1 tsp of cumin, and 1 tbsp of water. Cook for about 1-2 minutes.
4) Mix in crushed tomatoes (14.5 oz), 1 cup of plain yogurt, 1 tbsp of chopped cilantro, 1 diced potato, and 1 tsp of salt.
5) Return the chicken to the skillet and add 1/2 cup of water. Bring to a boil.
6) Add 1 tsp of garam masala and 1 tbsp of chopped cilantro. Reduce heat, cover, and let it simmer for 30 minutes.
7) Serve over rice, naan bread, or whatever your heart desires.

Link to original recipe
: http://allrecipes.com/recipe/indian-chicken-curry-murgh-kari/detail.aspx

I poured a generous amount over jasmine rice. It was delicious! Keep in mind, Indian cuisine is generally spicy. I have a high tolerance for heat, so I added more cayenne than the recipe called for. I will definitely be making this on a regular basis.

Read more...

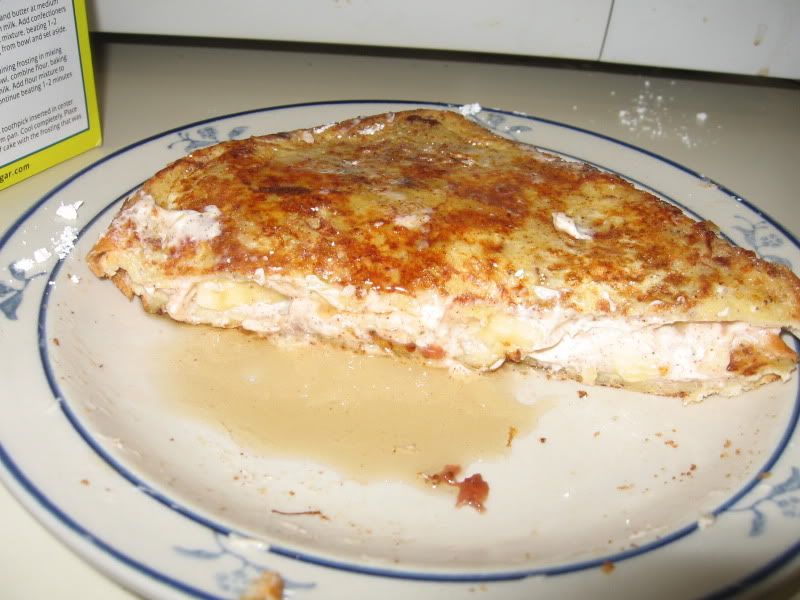
Cream Cheese & Banana Stuffed French Toast

 Friday, June 24, 2011


This is a recipe that I whipped up (no pun intended) this morning. It was very easy to make, and tasted delicious! The recipe is below. If you put your own spin on this, I would love to see how your french toast turns out.

Serving: 6

Filling:
1/2 tsp vanilla extract
3/4 tsp cinnamon
6 oz cream cheese, softened
1 1/2 tsp brown sugar
strawberry jelly (or any fruit jelly)
3 small bananas

Batter:
3 eggs
2 tbsp milk
1 tsp vanilla extract
1/2 tsp cinnamon

Other:
6 slices of bread
Dash of powder sugar
Maple syrup

1) Mix cream cheese, brown sugar, cinnamon, and vanilla extract until smooth. Spread the mixture onto each slice of bread, along with your favorite fruit spread. Add sliced bananas on 3 slices of bread. Place a slice of bread without bananas on top of a slice of bread with bananas.
2) Combine eggs, milk, vanilla extract, and cinnamon in a wide bowl. Whisk until smooth.
3) Melt 1 tbsp of butter on a non-stick skillet over low-medium heat.
4) Dip the bread in the mixture for approximately 5-10 seconds. Make sure both sides of the bread are saturated in the batter.
5) Transfer the soaked bread onto the skillet. Cook until golden brown on each side.
6) Sprinkle with confectioners sugar and drizzle with maple syrup if desired. Slice diagonally along each to create 6 servings.

I ate mine with a small side of strawberries and a glass of orange juice. I am stuffed! (no pun intended here either) Enjoy! :-)

Read more...

My 10 Summer Must Have Beauty Products for Summer

 Friday, June 17, 2011

Hi everyone! I was skimming through my blog, and I realized that almost all of my posts are either monthly favorites or hauls. So, today's post is going to be different. Summer is drawing close, and quite frankly, I'm not too upset about it. Summer used to be my favorite season because I would be out of school, and I was always confident about my body. However, since my first year of college, I have gained 30 pounds and I have lost a good chunk of that confidence. I am currently working on an exercise and "diet" plan that is feasible. Once I develop this plan, adhere to it, and (hopefully) see results, I will blog about it. I don't have a specific weight as a goal because I don't want to set myself up for failure and become discouraged. I just want to feel and look healthier, which is far more important than the number that displays on the scale.

Anyway, the main topic of this post is to share my top 10 beauty must haves for summer. I will also include some recommendations.

1) Sunscreen: This should be on everyone's top 10. It is very important to protect your skin from the sun's harmful rays. Yes, you can still get a tan wearing sunscreen (just to clear up any misconceptions). Every sunscreen should have SPF, which is the ability of a sunscreen to block UVB rays. Both UVB and UVA rays contribute to skin cancer, but UVB rays are more associated with sunburns. According to WebMD, a suncreen that has an SPF higher than 45 offers just as much protection as a sunscreen with SPF 45. Thus, a sunscreen with SPF 100 offers the same amount of protection as a sunscreen with SPF 45. It's essentially a marketing technique: more people will reach for the sunscreen with SPF 100 because they think they are getting more protection.
Recommendations:
-Neutrogena Ultra Sheer Dry-Touch Sunblock, SPF 100
-Shiseido Ultimate Sun Protection Lotion w/ SPF 60
2) Tinted moisturizer: Tinted moisturizers provide coverage (anywhere from sheer to moderate), but are typically more lightweight than foundations.
Recommendations:
-CoverGirl Smoothers SPF 15 Tinted Moisturizer
-Aveeno Positively Radiant Tinted Moisturizer w/ SPF 30
-Physicians Formula Healthy Wear Tinted Moisturizer SPF 50
-Laura Mercier Tinted Moisturizer SPF 20
-Hourglass Illusion Tinted Moisturizer Oil Free SPF 15
3) Lip balm w/ SPF: Your face needs protection, and that includes your lips too! During the winter and summer, my lips are constantly chapped and seriously resemble old raisins. That's not appealing. If you want some color on your lips, you can layer a clear lip balm underneath a lipgloss or lipstick, or just wear a tinted lip balm with SPF.
Recommendations:
-Soft Lips Lip Balm w/ SPF 20
-Burts Bees Lip Balm w/ SPF 15
4) Non-sticky lipgloss: I like to wear my hair down and drive with my windows down. Add a sticky lipgloss into that combination and you get a load of unwanted hair in your mouth--eck.
-Avon Glazewear Lipgloss
-Bare Minerals Buxom Lipgloss
5) Coral lipstick: Not everyone is on board with this trend, but I love it. Coral and (muted) orange are my favorite lip colors year round.
Recommendations:
-MAC Vegas Volt
-MAC Morange
-Illamasque Blaze
6) Cream blush: I prefer these over powder blushes during the summer because cream blushes have a longer lasting power. I typically like to set a powder blush on top of a cream blush, but lately, I have just been wearing cream blushes.
Recommendations:
-Sonia Kashuk
-Maybelline Dream Mousse
-NYX
7) Makeup setting spray: Makeup can run or melt off your face in heat. Makeup setting sprays will keep your makeup fixed in place, and I love that refreshing mist on a hot sunny afternoon.
Recommendations:
-Skindinavia
-Evian facial spray
-MAC Fix +
8) Deodorant: Who likes smelly, wet armpits? I don't think anyone does! Deodorant is a necessity, especially if you perspire easily.
Recommendations:
-Dove Antiperspirant & Deodorant
9) Bright eyeliner: Not everyone may be on board with this one either, but I love bright eyeliners for the summer. I like wearing a bright aquamarine or sea green color on my lower lashline for a pop of color. I don't do this everyday, but it's fun every once in a while.
Recommendations:
-Urban Decay 24/7 Glide On Pencils
-Sephora Jumbo Waterproof Liners
10) Face powder: If you have oily skin, this is a must. I have dry skin, but during the summer, I need powder to keep my face makeup in place. I sweat easily too, so I need to blot every now and then to counteract the shine.
Recommendations:
-Maybelline Dream Matte Powder
-Cargo Blu Ray Pressed Powder
-MAC Select Sheer Pressed Powder

Read more...

May Favorites

 Sunday, June 5, 2011

(warning: long, run-on sentence to come) I know I have been neglecting this blog for a while now, but I have been extremely busy working on my 60 page thesis, studying for my final exams (with online shopping breaks that consisted of putting hundreds of dollars worth of clothing and shoes into the cart, and woefully clicking the x on my browser... while simultaneously redrawing the amino acid structures in the back of my mind), graduating, and starting full time work. Whew! Perhaps, I will write a separate entry on everything that has happened this month. Anyway, I still found time to try out a few beauty products this month, and have found some worth sharing!


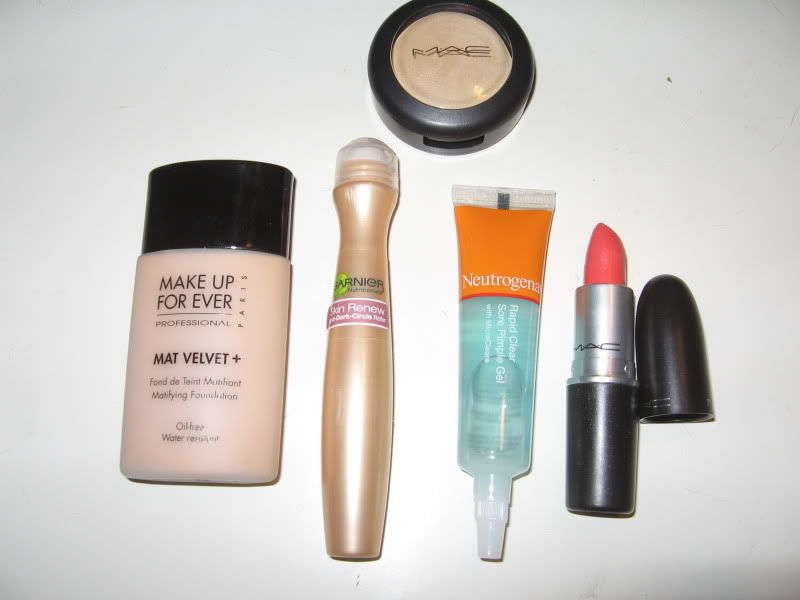
MAC Cream Color Base in Pearl: I swipe this down my nose, dab a bit on my cupid's bow, and apply it to my cheekbones. It gives me a healthy, bright glow without making my face look excessively shiny.

Makeup Forever Mat Velvet + Foundation: I am in the color Natural Beige #40, and it is the perfect shade for my skin. The coverage is moderate, but it is easily buildable. I am going to do an in-depth review on this foundation in a few days.

Garnier Anti-Dark Circle Eye Roller: I don't think the caffeine in this product makes my eyes look more awake, nor do I think the roll on packaging stimulates microcirculation. However, the color of this concealer matches my skin really well. It's quite sheer, but I don't have too much pigmentation under my eyes. If you have very dark circles, I would recommend a peach toned concealer over this one.

Neutrogena Rapid Clear Sore Pimple Gel: This isn't a miracle product, but if you are consistent with application, the pimples will disappear after 2-3 days. I get cystic acne--those large zits that are painful to touch--every time I'm on my period. Even if I refrain from popping them, they tend to leave scars. This product has effectively diminished those pimples without leaving scars behind.

MAC Lipstick in Vegas Volt: I love this color. It looks really bright in the tube, but gives my lips a natural looking flush. I do have pigmented lips, so the color may appear a lot brighter on those with paler lips.

Read more...

April Favorites!

 Friday, April 29, 2011

Hi, lovely readers. I bought a lot of beauty products this month because Ulta had pretty sweet deals throughout the month, and Sephora recently had a code that took 15% off the entire purchase. The swatches are on the bottom of the post, as usual.


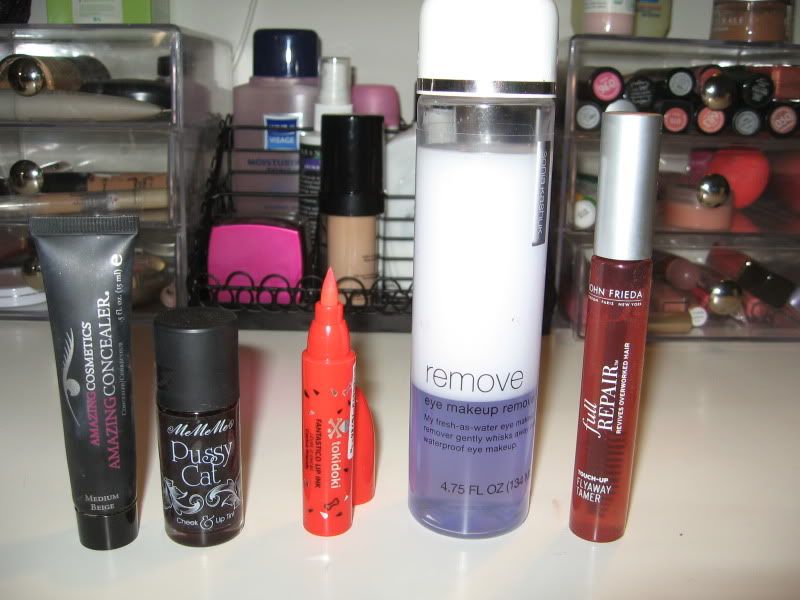
Sonia Kashuk Makeup Remover $9.99: I found my HG makeup remover. This is it. Best makeup remover EVER.

Amazing Cosmetics Amazing Concealer $42: I got this from Ulta when these were 50% off, which makes me love this even more. The consistency is very similar to MAC's pro long wear concealer. It's primarily liquid, but slightly creamy. It is really easy to blend, conceals well, matches my skintone (I bought mine in medium beige, and I'm a NW25) and does not turn cakey on the skin.

John Frieda Flyaway Tamer $8.99: It comes in a tube with a mascara-like wand. The product is clear and unscented. I have a lot of "baby hairs" and flyaways, especially after I blowdry. I've tried using dryer sheets to calm my flyaways, but it only keeps them tamed for a few minutes. This product is really effective, and it doesn't make your hair turn stiff, oily, etc.

NYC Bronzer in Sunny $2.32 (not pictured): I applied this like a blush, and it gave my face a healthy glow. I haven't had much luck finding a bronzer that suits my skintone, but this bronzer is definitely flattering on me.

Mememe Pussycat Cheek & Lip Tint: My friend got me two of these when she visited the UK. I'm pretty sure you can't find this in the U.S., but can be ordered on Ebay. This is the perfect dupe for Benefit's Benetint, but at a fraction of the cost! Benetint is $28, and the Pussycat tint is around $14 on Ebay. This gives my lips a nice flush of red, almost as if I applied a cherry red lipstick and gently wiped it off with a tissue. It looks nice with a neutral or simple eye. I also tried it on my cheeks, but the color was a bit too bold against my somewhat fair complexion. I think it will look nicer on a darker skintone, so I'm excited to wear it on my cheeks during the summer. It is also pretty easy to blend.

TokiDoki Lip Stain in Cactus Friends $10: I'm not usually a fan of lip stains since they tend to dry out my lips. However, this lip stain doesn't dry out my lips and I love the color. It's a coral, orange color, which is one of my favorite lip colors to wear year-round. Also, I'm pretty content with the staying power of this lip stain. It doesn't stay on all day, but the color stays put for a couple hours.

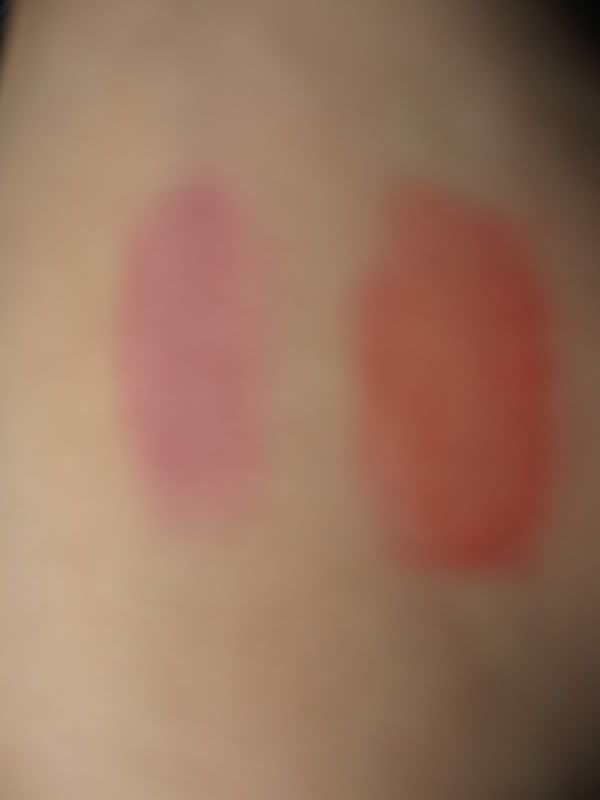
Swatches:
L to R: Mememe tint and Toki Doki lip stain

Read more...

Review: Loreal Paris Magic Smooth Souffle Foundation

 Wednesday, April 6, 2011


Before I start raving about this product, I'm going to provide some background on my skin type. During the winter, I have very dry skin. I get flaky, dry patches on my cheeks, the sides of my nose, and between my eyebrows. As the climate gets warmer, my skin gets less dry. During the summer, I have dry to normal skin with a slightly oily forehead. I also have extremely sensitive skin. Face products that contain the mildest ingredients can still cause irritation and redness.

I usually refrain from buying face products that don't have the following labels: for sensitive skin, oil free, fragrance free, non-comedogenic, and not tested on animals. The latter is not related to my skin type, but I must abide. I refuse to buy products from companies that test on animals. Unfortunately, I did not see ANY of these labels on this foundation jar, but I grudgingly purchased it per my best friend's recommendation (we have similar skin types). So here are the cons and pros of this product:

Cons:
-Packaging: the product is in a jar, which is not very hygienic. I use a clean cotton swab to retrieve the product.
-Coverage: my face is always red and I have some dark acne scarring on my chin. Unfortunately, the product does not provide enough coverage to conceal my flaws, but it is definitely buildable.
-Leaves a silky, almost oily residue when I first apply the product. However, this feeling does go away after a minute or so. This doesn't bother me because I like the added moisture, but this may not fare well with those who have oily skin.

Pros:
-Feels silky smooth (I know I listed this as a con, but it is a pro for me)
-Provides a matte, smooth look
-Isn't cakey
-I don't need a brush or a sponge to apply this.

Now, for some pictures... yes, I did some quick and messy editing. You can click on the pictures to enlarge them.

This is my skin after moisturizing and before the foundation:

This is my skin after foundation and before concealer:

This is my skin after foundation, concealer, and my makeup setting spray:


This product wins approval from me. Has anyone else tried this product? How does it work for you?

Read more...

March Favorites

 Wednesday, March 30, 2011

I feel guilty that I bought enough beauty products to write, yet again, a favorites post. But, I have some [legitimate] excuses: there are more days in March, I didn't have as many exams, and I had my spring break this month. Yeah... I feel better now. So, onto my favorite beauty products! (swatches are towards the bottom of the post)


  • L'Oreal Paris Studio Secrets Professional Magic Smooth Souffle Foundation $13.97: I love the texture of this foundation! It's feels like whipped cream. It is really easy to blend, and I don't need to use a brush or sponge to apply this. I'm going to do a more thorough review on this product, including pictures and application tips because this foundation deserves its own entry. That's how awesome it is.


  • Stila Crush Lip and Cheek Stain in Mango $24: I bought this at Ulta because they are having a special deal where you can get the Make Me Blush Cheek Color (item below) for free with any Stila purchase of $30+. Actually, I had originally bought this stain in the shade "Coconut", but it did not complement my skin tone. Mango is a bright coral color with a shimmery gold base. I love the color, especially with Stila's Make Me Blush Cheek Color on top. The combination of these two products give me a nice, rosy glow and helps the color stay put on my cheeks for several hours. I used this on my lips, but the stain was barely noticeable. Also, these stains are supposed to smell like their respective names. Coconut smelled great, but mango smells odd... fortunately, the scent isn't too powerful and fades pretty quickly.


  • Stila Make Me Blush Cheek Color $22.99: I've been eyeing this blush since it came out around Valentine's Day. I think the hearts are adorable, and the shade is a nice, coral color when all the colors are combined. It is a bit shimmery, but I found that I can easily dust most of the shimmer off my cheeks with my fingers. You can get this for free with any $30+ Stila purchase at Ulta. I'm not sure when the deal ends though.


  • Rimmel Lipstick in Kiss $2.64: I think this color is really cute for spring and summer. It's a slightly bright, watermelon pink color. I also love the moisturizing formula of the lipstick.


  • MAC Sheen Supreme Lipstick in Ultra Darling $14.50: I love this color. It's slightly darker than the Rimmel lipstick in Kiss, but I would still describe it as a watermelon pink. I also love the formula: creamy, moisturizing, and gives a nice, wet sheen.


  • Alterna Bamboo Smooth Kendi Oil Dry Oil Mist $14.05: This mist claims to nourish and improve the strength and flexibility of hair, banish frizz, and enhance shine. It is also a heat protectant. First off, I must say that I am kind of obsessed with the scent of this mist. I love the fact that it is also a heat protectant because I don't like applying more than one product onto my hair. I can't say if this product has improved my hair because I feel that my hair is pretty healthy. I've never colored it, and only use heat on my hair on rare occasions. In fact, I am extremely low maintenance when it comes to my hair. In terms of frizz and shine: yes, I have noticed that my hair isn't as frizzy and is shinier. I also like the fact that this doesn't leave my hair looking or feeling oily.


  • Swatches:

    From L to R: Stila Make Me Blush; Stila Mango Crush; Rimmel Kiss; MAC Ultra Darling

    Thanks for reading!

    Read more...

    Haul: Candles!

     Wednesday, March 23, 2011

    I am a fanatic of many things in life, and candles are one of them. Candles come in all sorts of aromas: you can put a bakery scented candle in your kitchen, a fresh scented candle in your bathroom, and a romantic floral scented candle in your bedroom! I also love fruity scents for my bedroom and kitchen. I just received my order from Candles by Victoria, and I really like these scents. First off, allow me to commend the owner of this business, Victoria. She is the only owner of Candles by Victoria, and has the full time job of being a single parent to two kids. Nevertheless, she always manages to fill every order in a timely manner. Thanks, Victoria! (I doubt she will ever read this though LOL) Anyway, onto the candles :)

    From L to R: Blueberry Monkey Bread, Coco Beach Baby Peach, Pineapple Upside Down Cake

    Blueberry Monkey Bread is definitely my favorite out of the three candles. It smells just like it sounds: a mesh of blueberries and monkey bread. So decadent! I'm not particularly fond of Coco Beach Baby Peach. It smells like a blend of peaches and cardboard, and is a bit too musky for my liking. :-/ Pineapple Upside Down Cake also smells delicious. It smells like fresh pineapples with a hint of shortbread cookies. Overall, these candles are a great buy. Each 9oz jar is $8.25 and shipping is a flat rate fee of $8.50. You can take 10% off your total purchase with this code: cbvictoria.

    I also bought two candles from Bath & Body Works since they were having a "buy two for $20" sale. However, I purchased these a couple weeks back, so I am not sure if this sale is still going on.
    From L to R: Passion Flower and Peach Bellini

    I haven't had a chance to burn Passion Flower, but it smells so delightful. According to the BBW website, this scent is described as: "Juicy passion fruit, watery pear and casaba melon combine perfectly with Tahitian vanilla." It's pretty spot on. Peach Bellini is also a very sweet scent. It smells like fresh peaches with a hint of vanilla and jasmine. I love both of these scents.


    On another note, I finally found a Vietnamese restaurant somewhat close to my house (~30 minutes) that makes bahn mi sandwiches. *happy dance* For some reason, I've been craving banh mi for the past two weeks. My boyfriend also found an Italian delicacy in the same shopping center that sells canolis, which he has been craving for... well, pretty much everyday. It looks like we'll be making frequent trips there.

    Read more...

    February Favorites

     Wednesday, March 2, 2011

    Aside from the fact that February was a month of many midterms and lack of sleep, I still managed to buy tons of beauty products. *sigh* Go figure :3

    These were my favorite beauty/health related items that I purchased and/or used several times during the month of February:


    • Nivea Visage Alcohol Free Toner $5.44: I've used toners in the past, but never considered them to be a necessity in one's skin care regimen. This toner is, by far, the best toner I have ever used. It is alcohol free, so it doesn't sting when I apply it. My face doesn't feel tight, dry, or irritated. The downside is that this product is difficult to find in stores. I've checked my local CVS, Rite Aid, and Target, and none of them carry this product. :(
    • Clean & Clear Makeup Dissolving Foaming Cleanser $4.99: This cleanser removes almost all traces of makeup. I know this because my toner picks up very tiny amounts of foundation/concealer residue after I cleanse. It's a foamy consistency, so application is quick and easy. Best of all, the cleanser is gentle and non-irritating.
    • Milani Mineral Blush in Luminous $5.99: I love the color, but the packaging is crappy. The clear, plastic part popped out when I tried to open the lid. I want to do an exchange, but every time I go to my local Target, this blush is sold out. The color is gorgeous though. It is a rosy, peachy pink with gold reflexes--similar to Nars Orgasm, but this blush is a more subdued pink.
    • Sonia Kashuk Creme Blush in Rosey $9.99: I love cream blushes, but I haven't had much luck with them. They are usually too solid, so the color is difficult to blend. This one, however, has a very creamy consistency, so it is easy to blend. I also love the coral color. On the other hand, I have to be careful when applying this blush because it is quite pigmented.
    • Wet 'n' Wild Brow/Eyeliner Pencil in Taupe $0.75: This is a brow pencil and an eyeliner. I still love my Physician's Formula brow pencil, but I have been using this one from Wet & Wild almost everyday since I bought it. The color is practically a perfect match for my natural brow color. I also like that it contains beeswax to help pat down my brow hairs and keep them in place.
    • Avon Glazewear Lipgloss in Apple Cinnamon $2.99: This is such a pretty color. The color is a nice, toned down mauvy red with shimmers. The lipgloss is also quite moisturizing, and it stays on for a long time. Best of all, this lipgloss is not sticky at all.
    • Green By Nature Lip Butter in Banana Shea $4.99: I love this lip balm. It glides on smoothly, protects my lips from the bitter cold, prevents my lips from becoming chapped, and smells delicious. It is 100% free of parabens and contains 95% natural ingredients. This pwns Burts Bees. Seriously.

    Swatches:
    Please excuse the crappy 2.0 megapixel quality. From L to R: Avon Apple Cinnamon, Milani Luminous, & Sonia Kashuk Rosey


    Read more...

    Blog template by simplyfabulousbloggertemplates.com

    Back to TOP